header

header
Showing posts with label soldering. Show all posts

Monday, 19 May 2014

Dragon and Girl Leaded Up!

Hi all! Over the weekend I finally got my Dragon and Girl piece leaded up.

Dragon and Girl stained glass by Maria McMahon, 2014


My (amazing, talented, wonderful, and - most importantly - very patient) teacher Brian Waugh helped a lot with this process and basically prevented me (very helpfully) from making a complete botch of it. As I would almost certainly have done if I'd attempted it on my own!

Those are Brian's hands. Not pictured: Your Narrator, in fetal position on the floor, wailing.

It was a very tricky leading up job, as the acid etching and multiple firings had made some of the pieces of the glass shrink and change shape. There was lots of grinding involved and it took us several hours to get the job done.


A very tricky leading process due to glass shrinkage from multiple firings

Can I just say that, while I like the piece and everything, I'm kind of tired of looking at it? It seems like I've been working on it for the past few ages! (OK, OK, so I have been working on it for the past few ages.) That being said, I am pretty pleased with the way it came out. I felt I didn't do too bad a job of the soldering. The leafy border is nice.

Leafy Border detail, Dragon and Girl stained glass piece by Maria McMahon

 Here are some more detail shots:

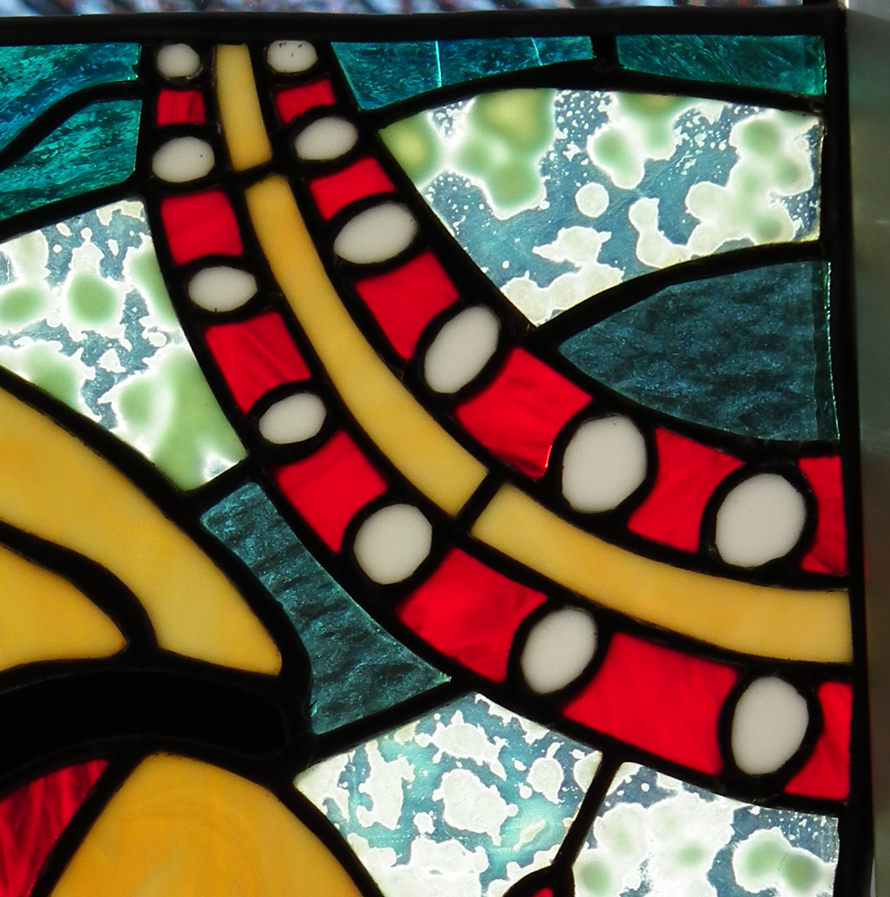
Girl detail, Dragon and Girl stained glass piece by Maria McMahon, 2014

Dragon detail, Dragon and Girl stained glass piece by Maria McMahon

All that still needs to be done is to cement it, give it a final cleaning, and get a frame contructed for it. The Scotsman has very kindly agreed to make the frame. Best husband ever!

Then, hopefully I'll be able to wheedle somebody into buying it. Anybody wanna buy it? Bueller? Bueller? Bueller?


Pin It Now!

Sunday, 23 September 2012

I made a stained glass octopus!

UPDATE: You can see the finished, framed piece here.

Hi all! Good news: today I finished soldering the stained glass octopus that I've been working on for what seems like forever.

I still need to put the lead came "frame" around the outside edges, and The Scotsman has said that he'll construct an actual wood frame for the piece. I also need to do the final cleaning to get off the fingerprints and winkle the last of the flux out of all of the little nooks & crannies. The piece is about 16.5 x 11.7 in.

I was just so happy to get it (mostly) done that I wanted to post some pictures!


The stained glass octopus with some sun coming through it. I wish you could see it in person, it looks so much cooler than photos can show.
Here's the soldering in progress. It's all full of flux.


Stained glass octopus, reverse side. He kind of looks like he's doing the Safety Dance.

A little closer up on the tentacles
Tentacle action!
So, what do you think? Would you hang it in your window? Pin It Now!

Saturday, 26 May 2012

Mid-Century Modern Inspired (Waste Not, Want Not)

Hi everyone! It was subtly represented to me by another work friend that a piece of stained glass wouldn't go amiss for her upcoming birthday, and who am I to say no?

Mid-century modern inspired stained glass piece by Maria McMahon
A sunny day in Scotland?! Somebody take a picture, quick!


I got started on this little piece last weekend and it's almost done - I just need to finish the lead came "frame" around the outsides of the piece.

For the background bits, I used this lovely textured glass that has an opalescent sheen. The circles are all scraps left over from other projects (my Grandma, rest in peace, had a wooden plaque on her kitchen wall that said, "Waste not, want not." I bet she approves.)

Mid-century modern inspired stained glass piece by Maria McMahon
Another angle - love the textured glass background bits
The piece feels kind of mid-century modern, which isn't necessarily what I had in mind when I drew the design. But since the mid-century modern aesthetic is one of my favourites, I didn't mind at all.


When I finish this piece, I plan to smooth down the solder on the small circle on the left. That got a little blobby there.

This is the start of an extended glass-making frenzy that I'll be in for the next couple of weekends. I'm going home to America to visit my family and friends very soon, and I want to bring home pieces as presents for at least 5 people, so I've got my work cut out for me. I've got all the designs drawn and the glass bought. Wish me luck! I'll post pictures as I go along.

Pin It Now!

Tuesday, 8 May 2012

Birthday present for a pal

It's a friend's birthday very soon, so I made a quick little piece for her.

I drew the design freehand very quickly, then cut it, foiled it, and soldered it in one Sunday afternoon. The only footnote I can really add is how easy it is to work with the 60/40 solder. Compared to the 50/50 solder I struggled so much with on the squid piece, the 60/40 was an absolute dream to work with. Here's the new piece:

Taken from below, with a little light through it. Not much light, mind you - this is Scotland, after all!

Taken straight on.
The piece is about 8 inches tall and 6 inches wide. It consists almost entirely of scraps left over from other projects.

For how quickly I banged this piece out, I think it's pretty nice. I hope my friend likes it! Pin It Now!

Sunday, 15 April 2012

[UPDATED] The Kraken has finally been released, plus some complaints about solder

Hey everyone! I finally finished the squid. I would have done it last weekend, but The Scotsman and I decided to spend the long weekend up in Ullapool, a beautiful little seaside town on the west coast of Scotland. We go up to Ullapool regularly. The first time was on our honeymoon, and we liked it so much that we just keep going back.
Wayyy up there!

One of the main reasons we keep going back to Ullapool is the bed and breakfast where we always stay: The Tamarin Lodge. Folks, if you ever find yourself in Scotland and want a luxurious, modern, clean and reasonably-priced bed and breakfast, this is the place to stay. The breakfast they serve in the morning is a thing of beauty; they have their own flock of chickens, and the eggs are that fresh.

So that's why I slacked off last weekend, despite the fact that my darlin' Scotsman had gone to get me some more solder while he was in Alloa (the nearest place that sells stained glass stuff.)

Now, I have to put in a word about the type of solder The Scotsman got me: unfortunately, I hadn't specified to him what kind of solder I wanted, and he got some bad advice from the store owner. He ended up getting the 50/50 solder instead of the 60/40. The different numbers denote the amount of lead to the amount of tin. 50/50 is half lead, and I found it much harder to work with than the 60/40 (60% tin) I'm used to.

All in all, the 50/50 solder was a real bummer. It bubbled up a lot, leaving pockmarks in the lead bead, and was really hard to get to lie in an even, non-blobby way. It also didn't seem to want to adhere to the copper foil, even though I'd fluxed it very thoroughly. It was not my favourite thing. So, if you're ever wondering which type of solder to get, I'd strongly advise getting the 60/40. Also, I now have a TON of 50/50 solder I don't know what to do with. Wanna buy it?

OK, enough preamble. Here's the finished squid:

(UPDATE: I've added a couple of pictures of the squid taken from outside of the house. I don't know why, but my camera is making the red parts look really, really orange when I take the pictures from inside. I guess I need a photography class too!):

Squid stained glass piece
THE KRAKEN HAS BEEN RELEASED!
Unfortunately, as with all stained glass, the picture really doesn't do it justice. The reds in the picture look very orange, but they're a darker red in real life. As you can see, I'm also still having issues with getting anything like a straight edge. But whatever!

Here's one taken from outside:
Stained glass kraken
The red parts are much redder, the light parts are much less yellow, and you can sort of see the mottling in the glass. Stupid camera!

I'm pretty pleased with the way it turned out, despite the non-straight edges and my troubles with the solder. Here's a detail of the tentacle:

Tentacle action!
Tentacle action!
One last one, again taken from outside:
Release the Kraken!
Squiiiiiiiiiid!

When you're as new to stained glass making as I am, every new piece is a learning experience. This one was definitely not an exception. I learned a lot on this one, not least because it was a really challenging design. 

To finish the piece, my plan is to go out to the beach, find some driftwood, and make a frame for the squid out of that. I think it'll look pretty cool!
Pin It Now!

Sunday, 1 April 2012

Out of Solder

Hey there! I bet you were wondering, "Gee, I wonder if she ever finished that squid."

Well, kind of. I got all of the pieces foiled up with copper foil, which, let me tell you, took a long, long time. When you foil your pieces of glass, you have to be really careful to get the piece of glass exactly in the centre of the foil, or it shows through on the other side. Then when you get the foil exactly placed on the glass piece, you have to burnish it down with a fid so that it sticks to the glass properly.

"Fid." I like that word. Here's what a fid looks like:

You burnish the copper foil with the flat bit at the end.

Since this squid piece has like a zillion little pieces of glass to foil, this took me, as I've already said, a long, long time.  But I really love when you get all of the pieces foiled. Each one looks like a little piece of jewellery in a copper setting.

All copper foiled up. 
Ain't it purty?
After that, you paint flux onto the copper and use your soldering iron to (theoretically) run a nice, even seam of lead along the copper bits, soldering the pieces together. In practice, my solder lines are not always as nice and even as I'd like them to be.

All in all, I got about halfway done with the front side of the piece, when I completely ran out of solder.

Looks like I'm going to have to return to the stained glass supply place before I can finally finish this piece. Curses!

Out of solder! Curses!
Pin It Now!

Thursday, 1 December 2011

Second Piece, in which I learn that Soldering Is Hard.

This second piece made me cranky. First off, my cutting skills were still pretty rudimentary (who am I kidding, "were"? Ha!) Cutting angles and even straight lines was something I thought I had to do freehand.

Now, the thing about cutting everything freehand is, it's not very exact. When you don't have exact cuts, your pieces of glass don't fit together properly. The slightest deviation in the first piece throws the second piece slightly out of whack, and so on until you have a piece of stained glass that is not so much square as...blobular.

This is especially so when you're using the copper foil technique. Lead came hides a multitude of sins where inexact cuts are concerned. You don't have that much leeway when you're using copper foil.

Oh, and did I mention? This was my very first experience with the copper foil method, and it is - let me tell you - a lot harder than it looks.

So, with all that said, here it is, in all its uneven, scraggly, blobular glory:

Are the pieces supposed to be all different sizes?

And then, oh lord. The soldering. Can I tell you how danged difficult running a bead of solder smoothly down an uneven seam of copper foil is? My solders were globby, spiky, and altogether crappeh.

As it turns out, none of this mattered, because I ended up breaking the damned thing anyway. Going back in to try and smooth out one of my solder seams, I overheated the central pentagon-shaped amber piece and it cracked. 

I think the death of this piece was a relief for everyone involved.
Pin It Now!